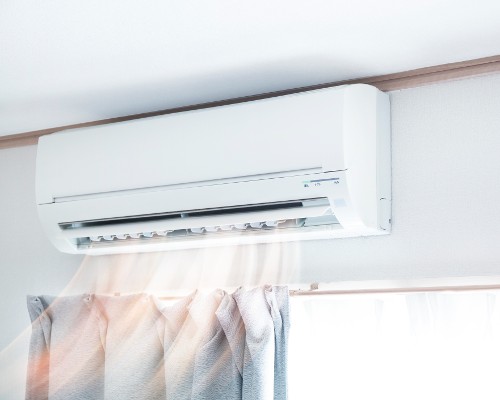
Mini split systems are efficient and versatile heating and cooling solutions that can be installed in various locations and settings. However, like any other HVAC appliance, they can encounter some issues or problems that affect their performance and proper operation.
In an effort to keep your mini split AC system running smoothly and efficiently, learning some basic troubleshooting solutions can go a long way.
In this mini split troubleshooting guide, we’ll review some of the most common mini split problems and how to approach them. Of course, all issues should be resolved by a trained HVAC technician, as they’ll have the right knowledge and tools to get your problem fixed. Regardless, it helps to know what they’ll be looking for.
Communication issues between indoor and outdoor units
One of the most common causes of mini split failure is improper communication between the indoor and outdoor units. Improper communication can result from using the wrong gauge of wire, incorrect wiring connections, poor signal quality, or damaged or defective components.
Here are a few things to look out for regarding mini split communication issues:
- Inconsistent or erratic operation
- The unit works in some modes, but not in others
- The outdoor unit powers up, but the indoor unit doesn’t respond
- The indoor unit displays error codes or blinking lights
- Unusual or loud noises coming from the unit
- Damaged or destroyed boards or compressor
Troubleshooting mini split communication issues can be done by a technician first checking the type and quality of the wire being used.
Most mini split systems require either an 18-gauge wire or a 14-gauge 4-conductor wire (14/4) for proper communication. The wire should not be solid core, but stranded, and rated for indoor and outdoor use.
If the technician is installing a mini split system in a commercial building, an armored cable may be required for extra protection.
Next, the technician will check the connections at both ends of the wire, ensuring they’re correct, secure, and match the terminal block labels (L1, L2, C). L1 and L2 are the hotlines, and C is the ground.
They may also add a fourth wire to provide additional ground, which can help prevent stray electrical energy from interfering with the signal.
Finally, they’ll check all of the components involved in the communication circuit, such as control boards, sensors, transformers, and relays.
Remember: always consult a trained professional when any electrical work is involved for your personal safety.
Grounding issues
A common cause of unit failure that will require mini split AC troubleshooting is the improper grounding of the outdoor unit. Grounding is crucial for any device that contains electronics, as it helps to protect them from power surges, stray energy, and radio frequencies.
If your outdoor unit is not grounded properly, you may experience some of the following problems:
- Improper or erratic operation
- Board or compressor failure
- Error codes or blinking lights
- Odd or loud noises
To troubleshoot grounding issues, the technician will first check the grounding wire connection at the outdoor unit, making sure it’s secure and attached to a suitable grounding point, such as a metal pipe or rod.
They may also ground the chassis of the outdoor unit to a ground rod for extra protection if required.
Secondly, they’ll check the quality and condition of your grounding wire and rod to make sure they’re not corroded, damaged, or loose.
Refrigerant issues
When it comes to troubleshooting mini splits, refrigerant is an important consideration. Refrigerant is the substance that circulates throughout the mini split system and transfers heat between the indoor and outdoor units.
It’s essential for the cooling and heating functions of the mini split system, as well as many other appliances in your home. However, refrigerant issues can arise due to leaks, improper charging, contamination, or incompatible types.
Here are some of the most common symptoms of refrigerant issues:
- Reduced cooling or heating capacity
- Ice build-up on the indoor or outdoor coils (especially in the summer months)
- Hissing or bubbling noises from the unit
- High or low-pressure readings on the gauges
To troubleshoot refrigerant issues, a technician will first check for any signs of leaks in the refrigerant lines, joints, valves, or coils. They may use a leak detector, soap bubbles, or UV dye to locate them. They’ll be sure to seal any leaks with the proper tools and materials.
Next, for mini split AC troubleshooting, they’ll check the refrigerant charge level and pressure in the system. They’ll use a manifold gauge set and a digital scale to do this.
They’ll need to follow the manufacturer’s instructions and specifications for charging the system with the correct amount and type of refrigerant. Most modern mini split systems use R-410A refrigerant, which operates at a much higher pressure than older types. Different types of refrigerant should never be mixed.
Lastly, they’ll check for any contamination in the refrigerant circuits. Contamination can result from moisture, air, dirt, oil, and other debris entering the system during installation or service. It can cause corrosion, clogging, freezing, or damage to the components.
They’ll use a vacuum pump and a micron gauge to evacuate the system before charging it with refrigerant if necessary.
Condensation issues
When troubleshooting mini splits, condensation can be a possible issue. Condensation is the water that forms on the indoor unit’s coil as a result of the cooling process. It’s collected in a reservoir and drained out through a pipe or hose.
However, condensation issues can occur due to clogging, kinking, freezing, or malfunctioning of the drain line, reservoir pump, or switch.
Some common indications of condensation issues include:
- Water leakage or overflow from the indoor unit
- Water dripping or staining on the wall or ceiling
- Mold or mildew growth on or around the unit
A few ways to troubleshoot condensation issues are first, the technician checking the drain lines for any clogs, kinks, or cracks. They may use a wet/dry vacuum, a drain snake, or compressed air to clear any obstructions. They’ll need to also make sure the drain line has a proper slope and is not too long or too short.
Secondly, they’ll check the reservoir for any dirt, debris, or algae build-up. They’ll use a brush, cloth, or bleach solution to clean it.
It’s also a good idea to check the float switch or sensor that detects the water level in the reservoir. If it’s faulty or stuck, they should adjust or replace it.
Thirdly, they’ll need to check the condensation pump if your mini split system has one. The pump is used to move the water from the reservoir to a higher or farther location. They should make sure the pump is properly plugged in, turned on, and working correctly.
Additionally, they’ll check the pump’s tubing, wiring, and outlet for any damage or blockage.
Other common issues
Aside from the common issues mentioned in the mini split troubleshooting guide above, there are some other possible problems that can affect your mini split system.
Dirty filters or vents
It’s a good idea to routinely clean or replace the unit’s air filter and vents to maintain good airflow and indoor air quality in between maintenance servicing.
Power supply trouble
Have a technician check the circuit breaker, fuse, plug, cord, and switch for any tripping, blowing, burning, or loose connections.
Remote control problems
They should also check your system remote control for batteries, settings, and signal for any low power, incorrect mode, or interference issues.
Sensor trouble
Consider having them check the temperature and pressure sensors for dirt, damage, or displacement every so often, as they can affect their readings and operation.
Fan trouble
For troubleshooting mini splits, the technician should also take a look at the indoor and outdoor fan motors and blades for any debris, damage, or obstructions that can affect speed and performance.
The importance of hiring a qualified professional
If you encounter any of these issues or any other problems that you cannot troubleshoot or fix yourself, you should always contact a qualified technician for professional assistance.
Do not attempt to repair or service your mini split system if you’re not trained or experienced in the HVAC industry. Doing so may void any warranty, cause further damage to your system, or result in personal injury and property damages.
Get in touch with Autumn Air for troubleshooting
Mini split systems are fantastic HVAC appliances that can save you money and keep temperatures comfortable in multiple rooms in your home, as long as they’re well maintained and taken care of.
We hope this mini split troubleshooting guide provides some insight into how to address common issues mini split systems face. Troubleshooting mini splits can seem like a daunting task, but with the right due diligence, you can avoid costly repairs and ensure your system runs smoothly all year round.
It’s always best to contact the professionals at Autumn Air for help. Our experienced technicians are ready and eager to assist you and ensure that your mini split systems are running efficiently.
Don’t wait, contact Autumn Air today!


